
The Power of Backlinks in SEO
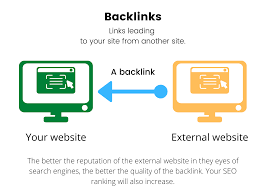
Backlinks are an essential component of any successful SEO strategy. They play a crucial role in determining the ranking of a website in search engine results pages (SERPs). In simple terms, a backlink is a link from one website to another. When a website links to your site, it signals to search engines that your content is valuable and worth referencing.
Backlinks are like votes of confidence for your website. The more high-quality backlinks you have from reputable websites, the more authority and credibility your site gains in the eyes of search engines like Google. This, in turn, can lead to higher rankings and increased visibility for your web pages.
However, not all backlinks are created equal. It’s important to focus on acquiring backlinks from relevant and authoritative websites within your industry. Quality always trumps quantity when it comes to backlinks. A few high-quality backlinks can have a more significant impact on your SEO than numerous low-quality ones.
Building a strong backlink profile takes time and effort. It involves outreach, relationship-building, and creating valuable content that others will want to link to. While it may be tempting to buy backlinks or engage in black hat SEO tactics to quickly boost your rankings, this can result in penalties from search engines and damage your online reputation.
At KeyBoost, we understand the importance of organic link building and ethical SEO practices. Our team of experts can help you develop a sustainable backlink strategy that will improve your website’s visibility and drive organic traffic over time.
Remember, when it comes to backlinks, quality always trumps quantity. Invest in building relationships with other websites in your niche and creating valuable content that naturally attracts links. This long-term approach will pay off in the form of higher rankings, increased traffic, and better overall performance for your website.